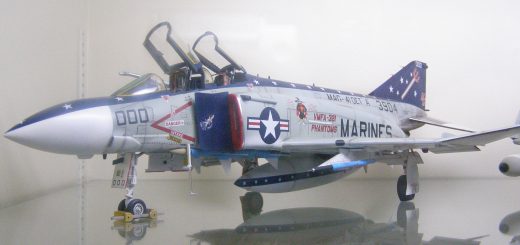
Build Review: MPM 1/48 P-63A King Cobra
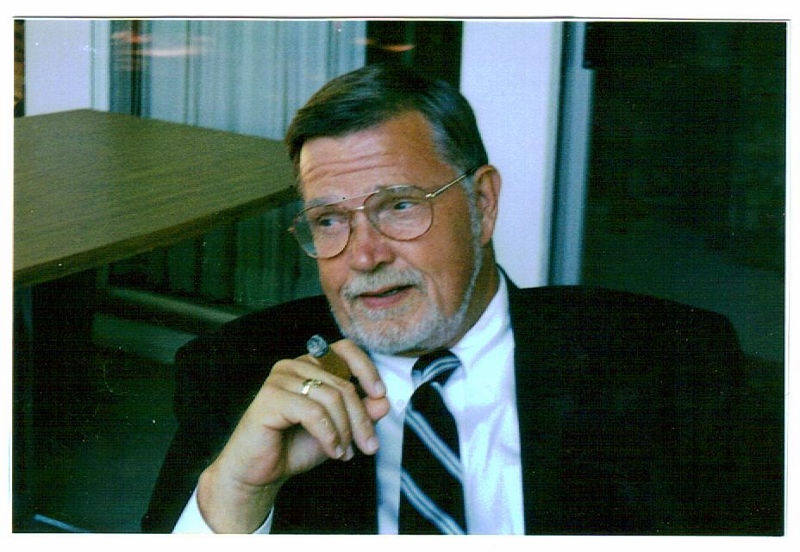
Model, photos, and article by Ed Kinney.


ADVENTURES IN SADO MASOCHISM 101:
MPM’s 1/48 P-63A King Cobra
This condition, at least for modelers, occurs when the overwhelming desire to add to your personal collection a model that every ounce of common sense just screams at you “if you do this, you are dumber than a bag of hammers!”
This was the case in this instance, spurred on by having done the review on the recent Accurate Miniatures release of the Racing Cobras. So I said to myself, “self…how tough can a P-63 be?” BIG MISTAKE !! If you haven’t encountered any of the MPM kits, read and heed.
First, they originate from the Czech Republic, but if you’d like to compare it to the quality of the Eduard kits, don’t because the similarity ends with the word “Czech”. If you were to list the manufacturers of kits starting with the worst, MPM would come in second only to have been bested by Mach 2 kits. In truth, these nearly unidentifiable lumps of plastic make even Fonderic Miniatures look like Tamiya releases.
In the case of MPM, I’ve included an image of the “daisy wheel” parts tree, just to give you an idea of what you’re up against. These are molded with an overabundance of flash, and no identifying numbers adjacent the parts. One needs to refer to the instructions to determine just what is supposed to be what. (The drawings look a helluva lot better than the parts.)
The main parts of this kit do have engraved panel lines, but they are so lightly done, each one had to be gone over with a needle in a pin vise to make them show up at all. There are also resin parts included, some useable, some not. (The main wheels detail was all but destroyed by pin holes and bubbles) A vacuform canopy is also supplied (more on this later).
The basic assembly of cockpit, fuselage, wings and tail feathers was not without incident. The fit at the wing and stab roots was atrocious. After getting things aligned, we turned to one of my favorite “cure alls”. Apoxie Sculpt. (At this point, I understand that I’ve been asked to do a demo at a chapter meeting on this subject, so I won’t dwell on the subject now.) On MPM kits, there are no locator pins for anything, so you’re basically on your own when it comes to alignment. (A set of right angle triangles comes in extremely handy!) Once the basic assembly was complete with all gaps filled with either cyno acrylic glue or Apoxie, I began test fitting the other kit parts… NOT !!
After removing the vacuformed canopy from the backing, I discovered that it nested on the fuselage at least 1/8” short of the opening. Grrr! Long story short, creativity is called for here, so I pulled an extra Eduard P-39 from the stash and began to rob parts here and there. The aft portion was removed from the Eduard canopy and molded in, while the forward half of the vacuform was cut, fitted and molded in to the fuselage. A major operation to say the least. In essence, I wound up using and modifying approximately 20% of the Eduard parts on the P-63. This included all 3 landing gear (mains had to be extended and made beefier), gear doors, prop blades, spinner and some interior parts. After everything was test fitted, the entire aircraft (after clipping the wings and stabilizers) was primed with auto primer and given a coat of “Refrigerator white” lacquer. Allowed to dry overnight, it was rubbed out with DuPont Polishing Compound. At this point, a panel line wash of a light grey acrylic was applied. The decals, from the now defunct firm of “Race Plane Decals” were used, and after drying, the subject was over sprayed with 9 or 10 coats of clear lacquer. Drying time was approximately 15 minutes between coats, with the final coat sprayed very wet at 15 P.S.I. and was left to dry overnight. Again, the final polishing with DuPont Polishing Compound followed by liberal use of “The Treatment”, an automotive wax that is pure carnuba with no grit of any kind contained. Final assembly of all the parts followed, with the only remaining task being the exhaust scorching and staining along the fuselage sides. This was accomplished as follows:
- Using Tamiya “Buff”, an extremely light coat is applied to the desired area. This was thinned almost 20 parts thinner to 1 part paint, and sprayed at 6lbs P.S.I.
- Spray thinned Testors Dulcote on the exhaust area only
- Pastel chalks of dark beige, medium brown black and light grey (in this order) are applied, one over the other using an angle brite brush.
- Blend these colors by lightly using a cotton bud
- Over spray the areas with your choice of Testors Dulcote or a 25 to 1 mix of Floquils “grime”.
Then, now wasn’t that easy??? Not only no, but h… NO!
I must assume that you, if you’re adventurous enough to try one of these, or any other MPM kit, that you are obsessed with adding it to your collection. I know that I must have been, but I can assure you, that this lightning won’t strike in the same place twice !
Ed Kinney IPMS # 2989
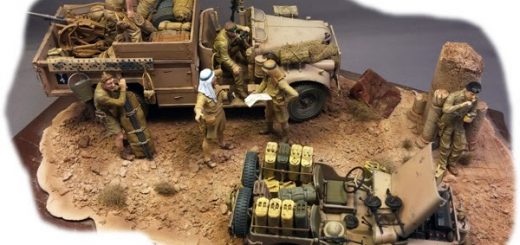
Photo notes:
P-63 King Cobra flown by Charles Tucker.
This aircraft, with 6 ½ feet clipped from each wing was the most radical chop job to have ever raced in the Thompson Trophy dash. The wing span, after surgery, was a mere 25 feet! In 1946, they held a meeting of the race pilots to suggest changing the race from a 4 to a 3 pylon event. Tucker said that he could not hold altitude for more than a 90 degree turn, so 4 pylons it was.
Thompson Trophy medallion:
The was one of the original hand outs to the participating race pilots at the pre-race dinner in 1946 in Cleveland. It was given to me by the late Allen Vopal, and is a very special part of my memorabilia collection.


Recent Comments